Guide & restore

Restore Rippex Wallet and recover an old XRP wallet

A complete Rippex wallet restore walkthrough: install the desktop client, reopen an old encrypted account file or import your XRP secret key, and get back into a wallet you created years ago — every screen shown in the order you meet it.

Rippex wallet restore: the three ways back in

1. Restore from the secret key

The XRP secret key beginning with s is the master credential of an old XRP wallet. Install Rippex, choose to restore an existing account, paste the key and set a new local password. The original r-address and its full balance reappear, because the funds live on the ledger, not in the app.

2. Reopen an old account file

If you still have the encrypted wallet file created by an earlier Rippex install, copy it to the new machine and unlock it with the password you chose then. The file is AES-encrypted locally; without the password it cannot be recovered by us or by anyone else.

3. Restore a paper backup

Secret keys written down on paper during the original setup work exactly like a digital backup. Type it carefully — keys are case-sensitive — and always restore on a clean, offline-capable machine before moving funds.

Without the secret key and without the account-file password, an old XRP wallet cannot be restored: Rippex is non-custodial, so no server anywhere holds a copy of your credentials.

Step 01

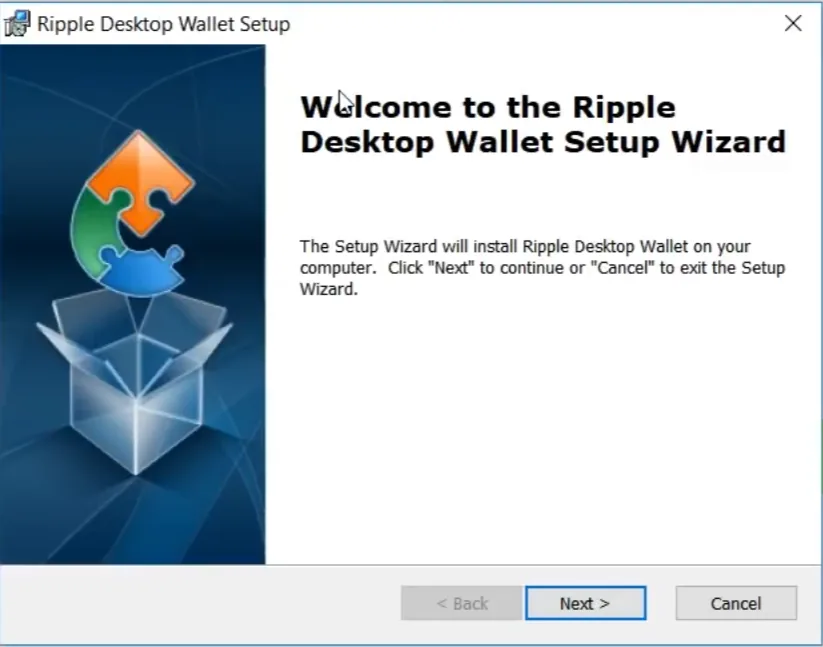
Start the setup wizard

Double-clicking the installer opens the setup wizard. No administrator elevation is needed for a standard per-user installation.

Ripple Desktop Wallet setup wizard welcome screen

The wizard only unpacks the application; it does not create a wallet, generate keys or contact the network. Nothing sensitive happens at this stage.

Click Next to continue, or Cancel to leave your system untouched.

Step 02

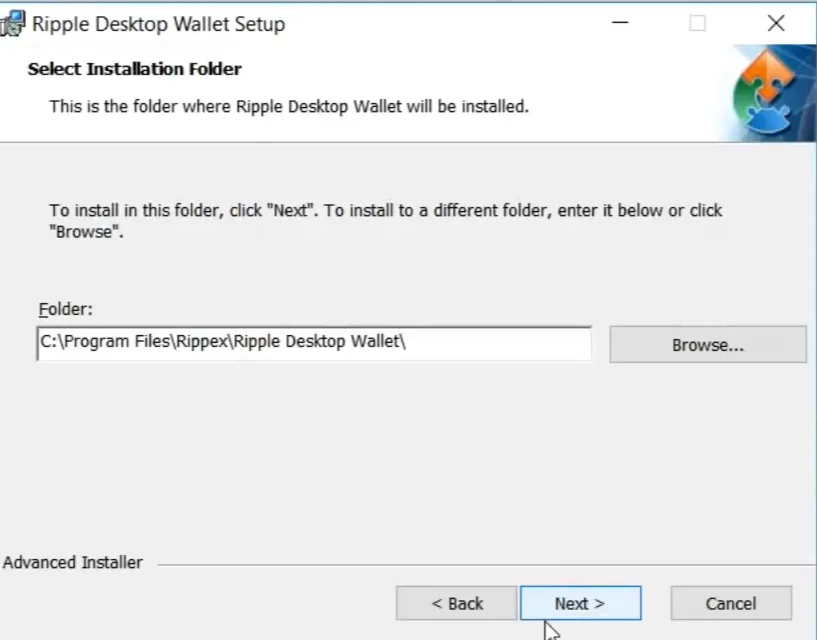
Choose the installation folder

The default target is C:\Program Files\Rippex\Ripple Desktop Wallet\. Any path works, including an external or encrypted drive.

Setup wizard asking for the installation folder under Program Files Rippex

The program folder holds only the application binaries. Your account file is stored separately, in a location you pick later, so reinstalling never touches your keys.

Note the path you choose — you will want it when verifying or removing the installation.

Step 03

Let the installer copy the files

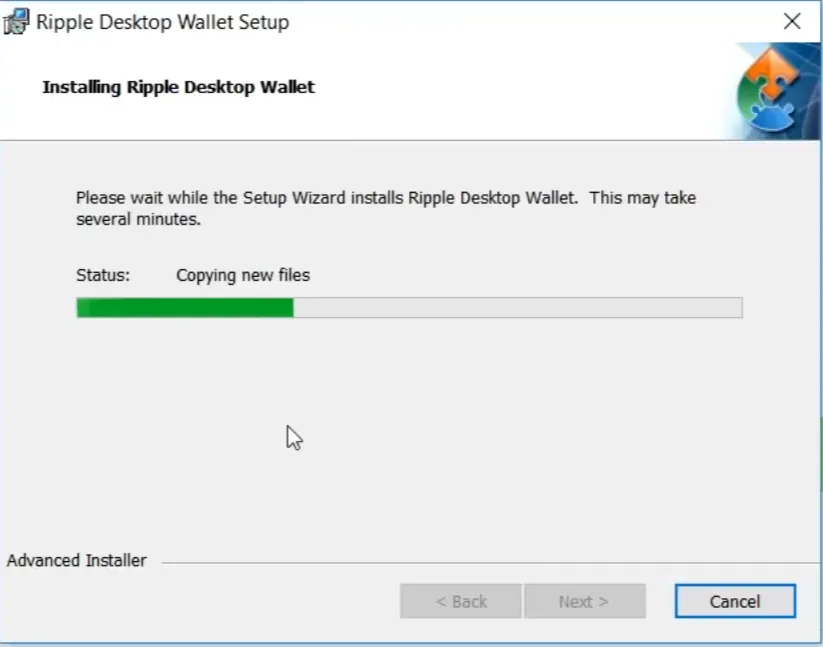
The wizard now copies the application files. This takes a few seconds to a minute depending on your disk.

Setup wizard copying the Ripple Desktop Wallet files during installation

Do not cancel midway — an interrupted install can leave a partial program folder that has to be removed by hand before retrying.

If your antivirus asks about the new executable, allow it — the client needs an outbound TLS connection to reach a rippled node.

Step 04

The account screen

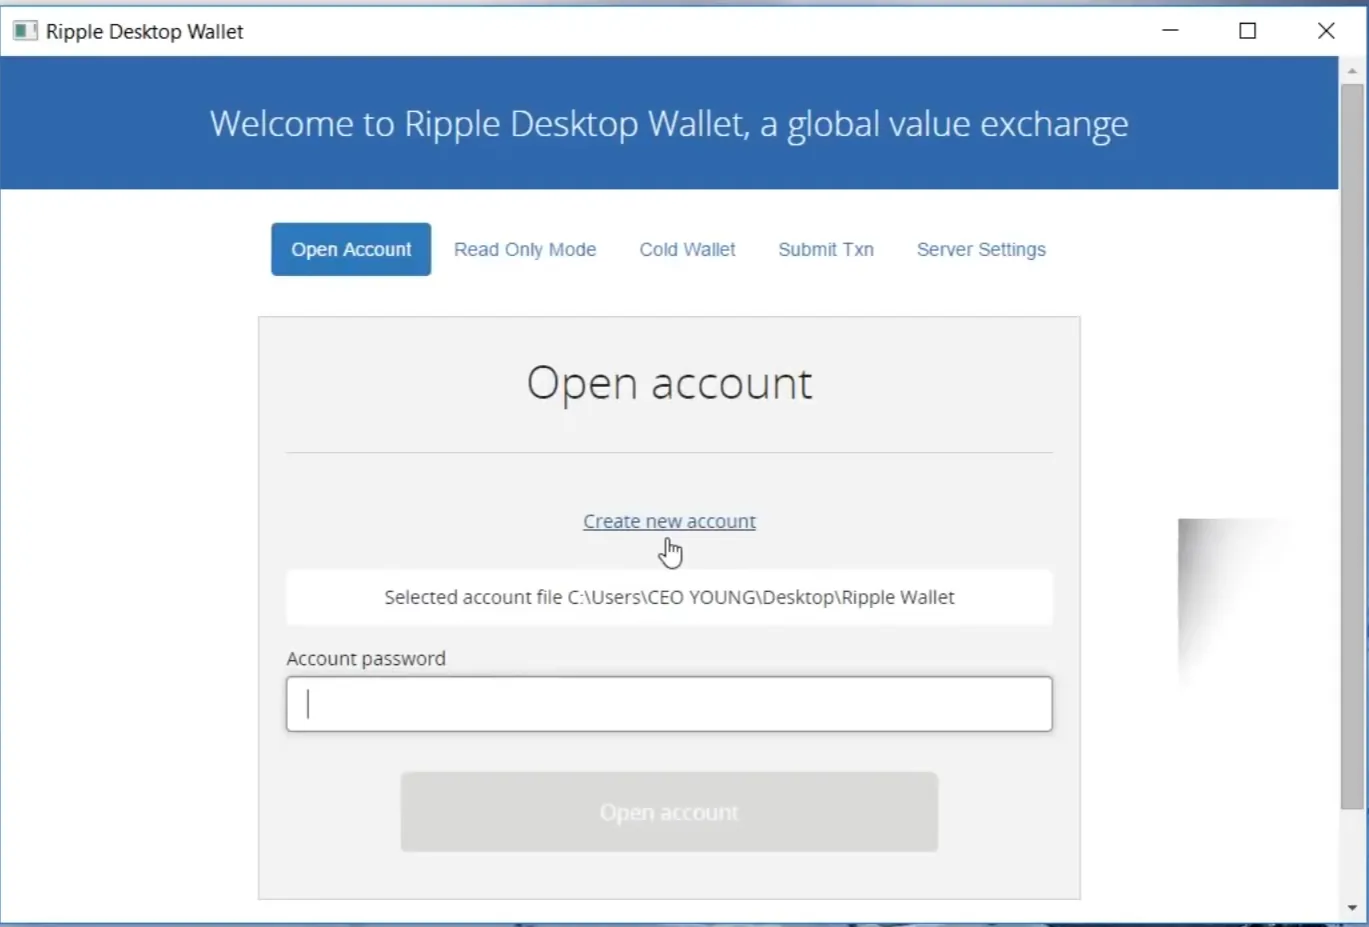
The home screen offers Open Account, Read Only Mode, Cold Wallet, Submit Txn and Server Settings.

Open account screen with tabs for read only mode, cold wallet, submit transaction and server settings

Open Account loads an existing encrypted account file with its password. Create new account starts a fresh keypair.

Read Only Mode watches any address without a key. Cold Wallet signs offline on a machine that never touches the network, and Submit Txn broadcasts that signed blob from an online machine.

Server Settings is where you replace the default public node with your own rippled instance.

Step 05

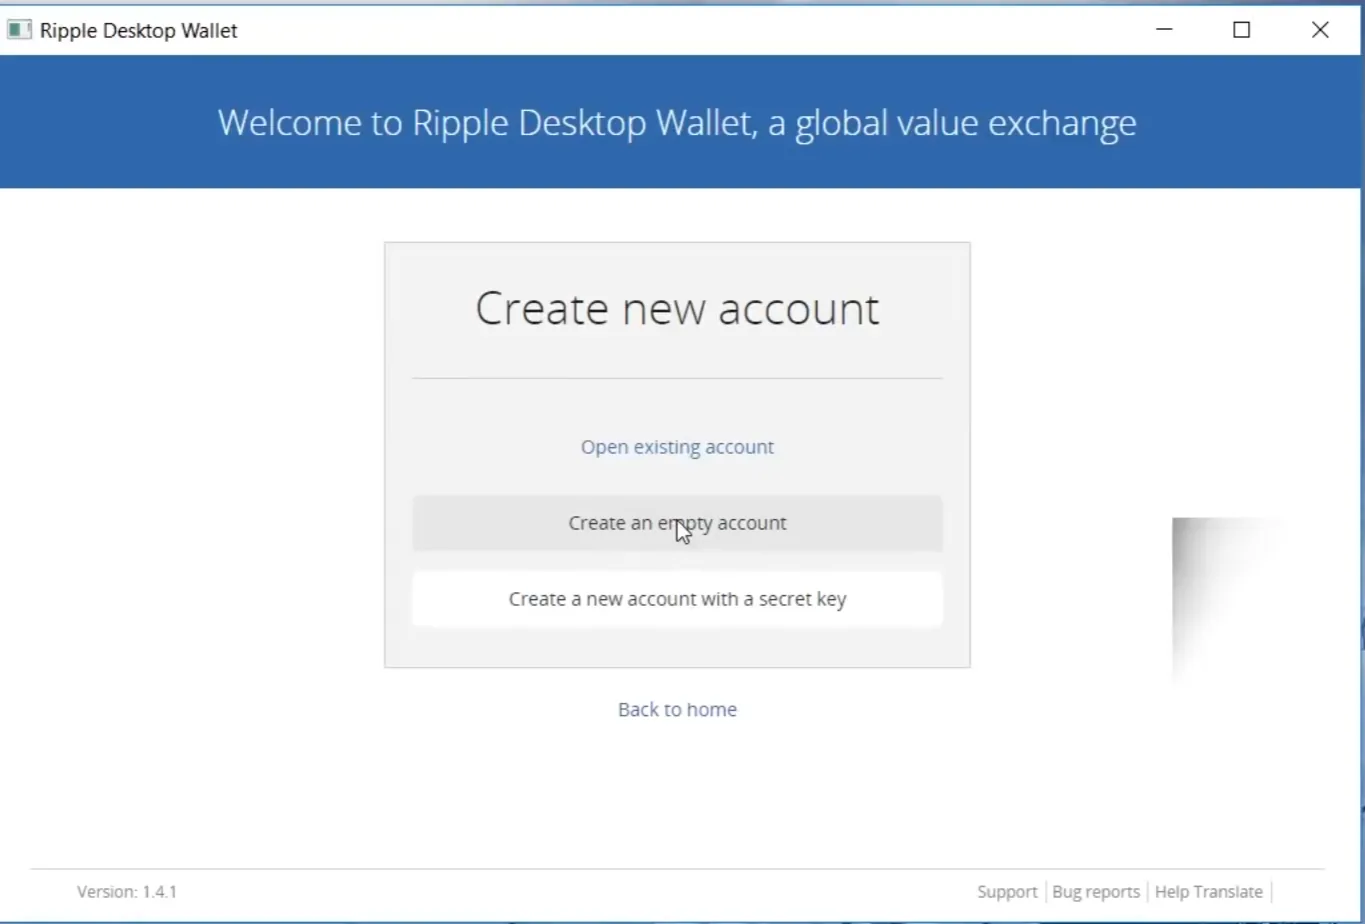
Create a new account or restore from a secret key

Create an empty account for a brand-new keypair, or choose Create a new account with a secret key to restore an old XRP wallet.

Create new account screen offering an empty account or a new account from a secret key

The secret-key option is the restore path: paste the key that starts with s, set a new local password and the original r-address with its full balance reappears.

Either way the result is a locally encrypted account file — use a long passphrase you can reproduce from memory and never reuse a password from another service.

Step 06

Write down the secret key

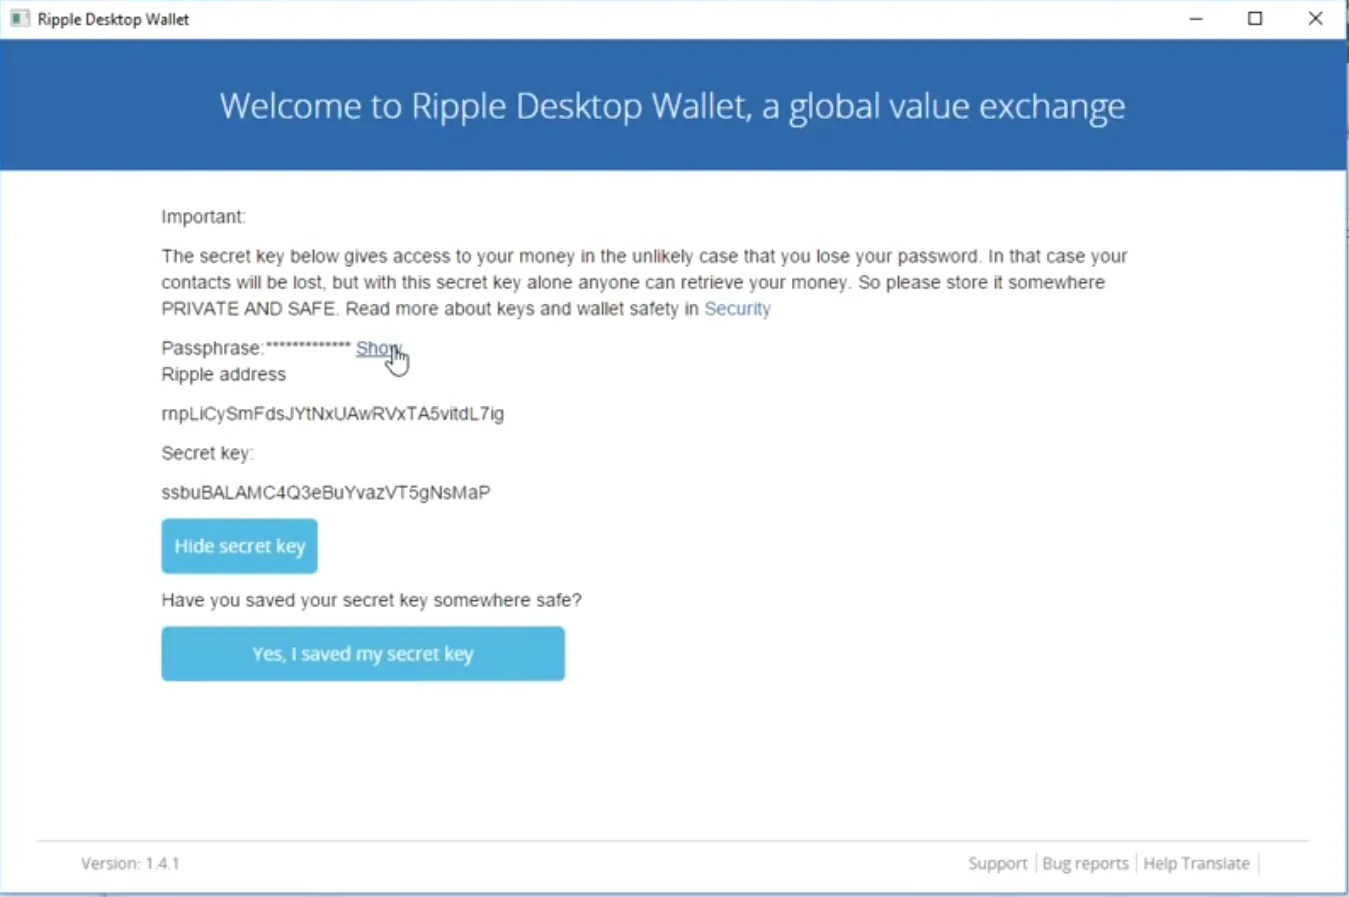
The client now reveals your classic r-address and the secret key that starts with s. This is the only time it is shown in plain text.

Screen displaying the ripple address and the secret key with a confirmation button

The secret key alone controls the funds. With it you can restore the account in Rippex or any other XRP Ledger client, even if the password and the file are gone.

Copy it by hand onto paper — not into a screenshot, a note app, a cloud drive or a chat — and store the sheet in a private, dry place. Anyone who reads it can move your balance.

Only after the sheet is safe click the confirmation button, then fund the address with at least the base reserve to activate the account on-ledger.

Step 07

Unlock an existing account file

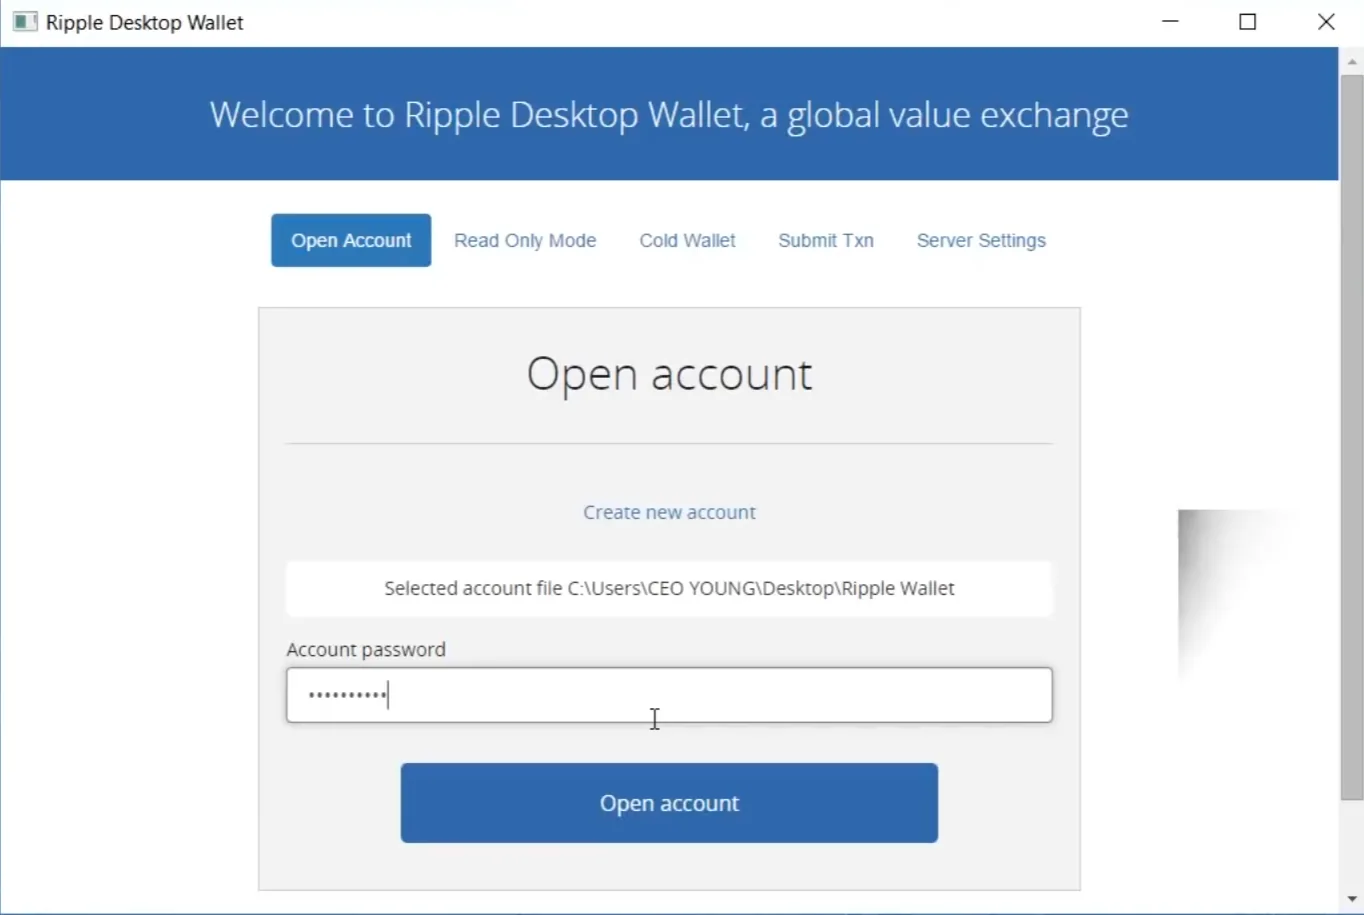
On every later start you pick the saved account file and type the password you set for it, then click Open account.

Open account screen with the selected account file and the password entered

Keep the file outside the program folder so an uninstall or reinstall cannot delete it, and copy it to a second medium such as a USB stick.

The file is useless without the password, so an offline backup copy is safe — but without either the password or the secret key the wallet cannot be recovered by anyone.

Step 08

Activate the account and read the overview

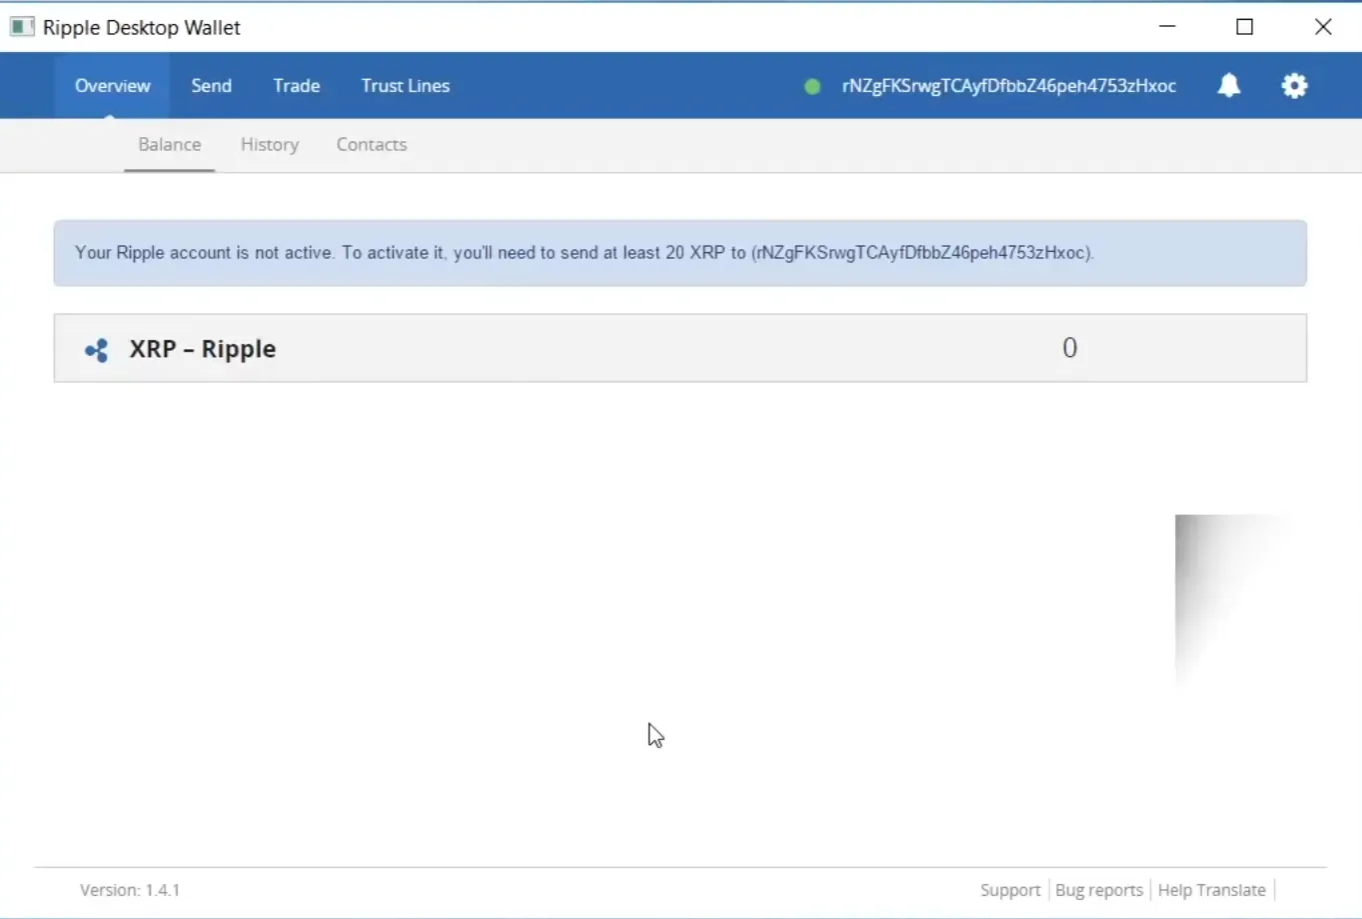
The wallet now opens on the Overview tab, with Send, Trade and Trust Lines alongside it and your r-address shown in the header next to a green connection indicator.

Wallet overview showing an inactive account with a zero XRP balance and the activation notice

A fresh address is not yet an on-ledger account, so the client displays a notice asking you to send the base reserve — 20 XRP in this build — to your own address. Until that payment is validated the balance line reads 0 and no transaction can be signed.

Send the reserve plus whatever you intend to hold from an exchange or another wallet, using the exact address and a destination tag only if the sender requires one. The notice disappears within seconds of the funding transaction being validated.

From there, Balance lists XRP and any issued assets, History shows each transaction with its hash and result code, Contacts stores addresses you reuse, and the gear icon holds the rippled node settings.